Accessibility
Color Blindness
Links
A general overview of color blindness in games: Color Blindness
Simulating Color Blindness In Unity (URP)
Quickstart
Note
The following tutorial is for projects using the Universal Render Pipeline. We take advantage of URP’s Post Processing Color Lookup Override. For those using the Built-in Render Pipeline, check out the Colorblind Effect Package
Download the Color Blindness Simulator Unity Package Here:
ColorBlindnessSimulator.unitypackage. This package contains LUTs for a variety of color blindness conditions. If you would like to learn how to create your own color blindness LUTs, see Build Your Color Lookup Textures From Scratch.Import the Unity Package into your URP project by going to Assets > Import Package > Custom Package
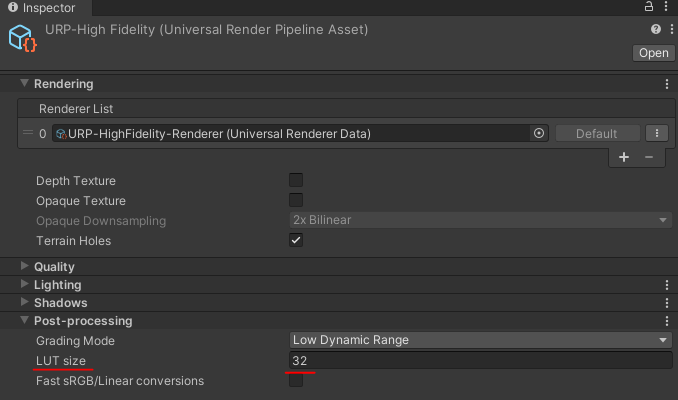
This example uses LUTs with a height of 32 pixels. To make sure URP can accept this size go to your URP asset and under Post-processing set the LUT size to 32.
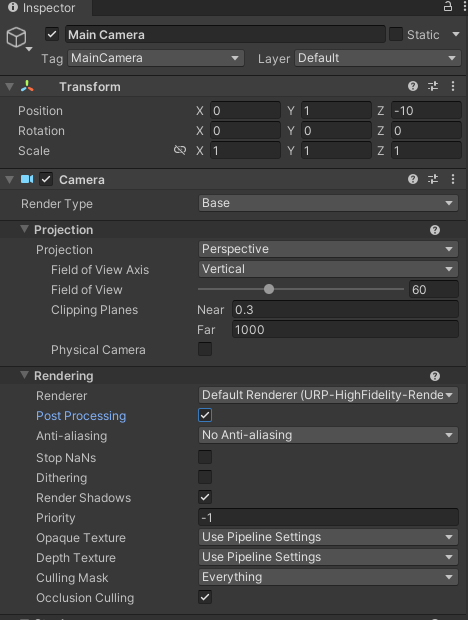
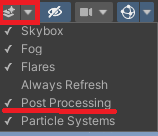
In a new scene, select the main camera and under the Rendering Setting enable Post Processing. Also make sure the post processing effect is toggled in the scene view. We use URP post processing to achieve the color blindness effect so this way you will be able to see the post processing effects in the scene view as well as the game view.
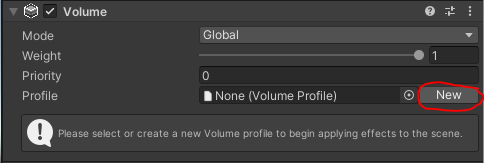
Next create a new global volume (Right click in the Hierarchy > Volume > Global Volume)
Inside the Volume inspector, next to the profile field click the New button.
Click the Add Override button and select Color Lookup
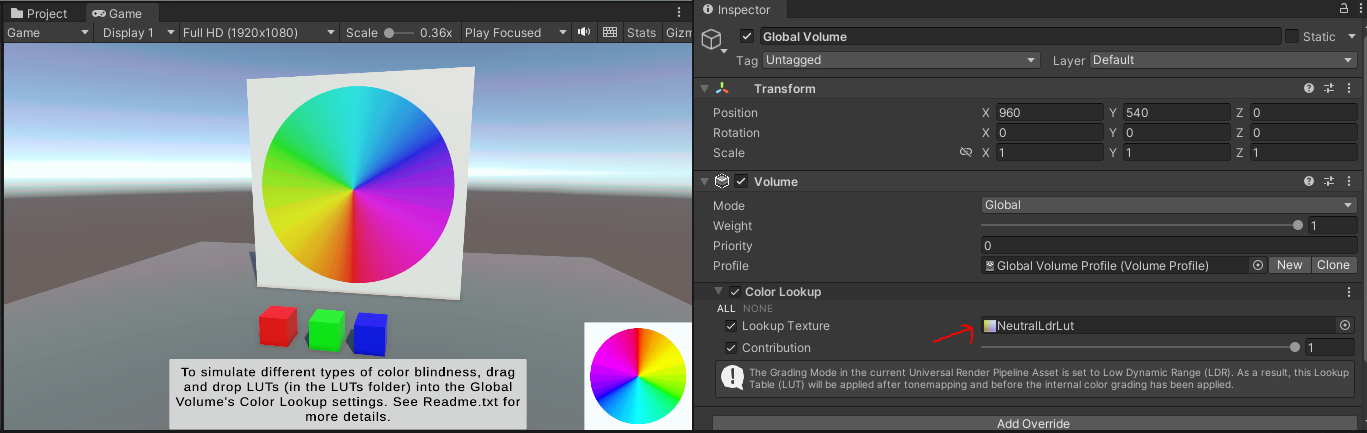
Inside the Color Lookup menu check the boxes for Lookup Texture and Contribution and set the Contribution to 1.
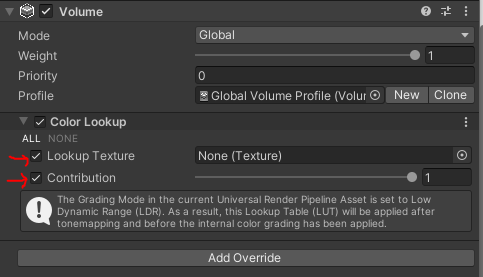
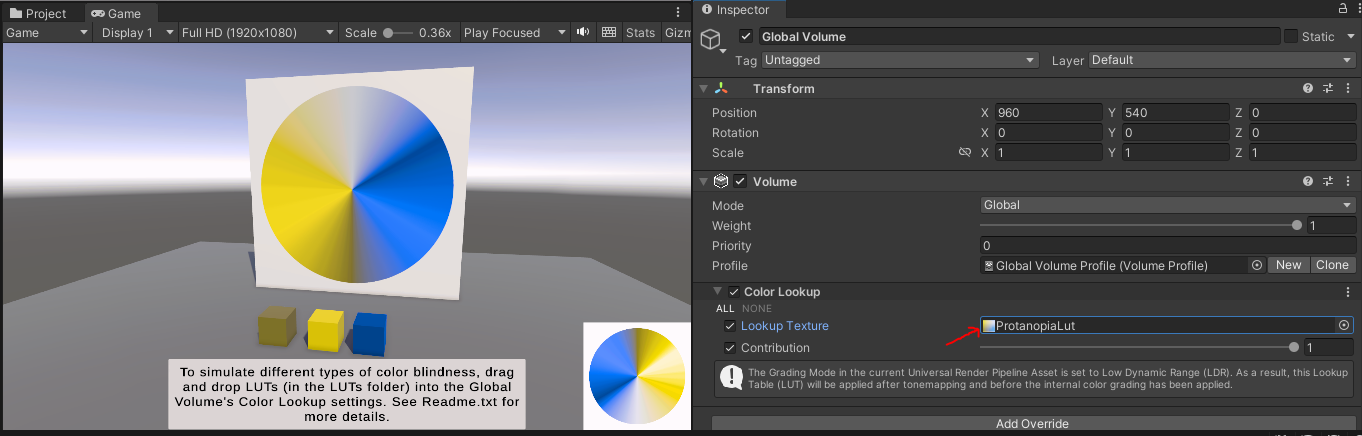
At this point you can drag in any LUT texture into the Lookup Texture slot and see its effects in the Scene View and Game View.
Note
You may encounter the following error:
Error
“Invalid lookup texture. It must be a non-sRGB 2D texture with the same size as set in the Universal Render Pipeline Settings
To fix this:
Make sure that you did step 3 properly and set Post-processing set the LUT size to 32.
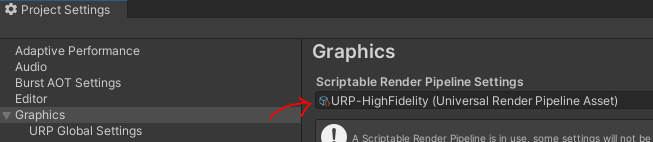
Make sure that you are using the correct URP asset (Go to Edit > Project Settings > Graphics > Scriptable Render Pipeline Settings)
Make sure the LUT images are imported with sRGB (Color Texture) disabled. (The package contains a preset called _Lut_Texture_Importer_Preset you can use)

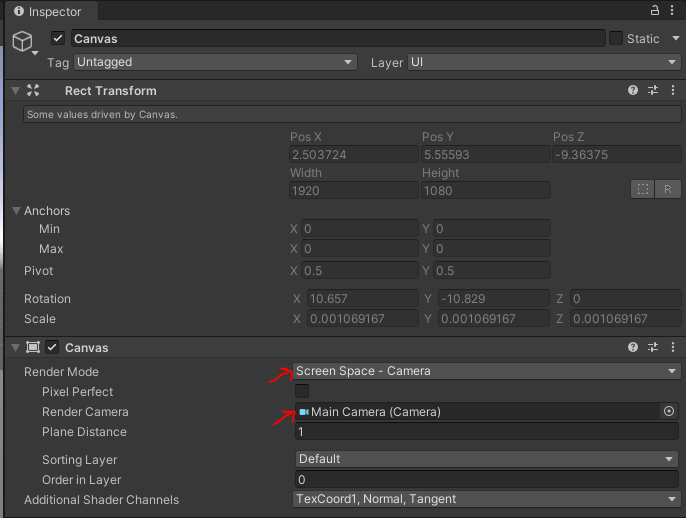
If you want to affect colors inside the canvas, you need to set the canvas object’s Render Mode to Screen Space Camera** and select the Main Camera as the render camera. If you find your UI elements are now behind objects in your scene, you can set the canvas’s Plane Distance setting to a small value.
Build Your Color Lookup Textures From Scratch
Download a neutral color lookup table (color LUT). You can find links to some at:
(1024 x 32) https://forum.unity.com/threads/where-to-download-a-urp-postprocessing-neutral-color-lut-16-and-32.786359/
(256 x 16) https://discussions.unity.com/t/neutral-lookup-textures/106554/2
(256 x 16) https://stackoverflow.com/a/66292971
If you cannot find any LUTs you like or the links above no longer work, you can copy the LUTs below:
(1024 x 32)
NeutralLdrLut.png.
If you are already using an LUT in your game just use that one.
Visit a website that allows you to simulate color blindness on uploaded images. For this exercise I used the one provided by Pilestone
Upload the LUT, pass it through the color blindness filters and download the resulting images.